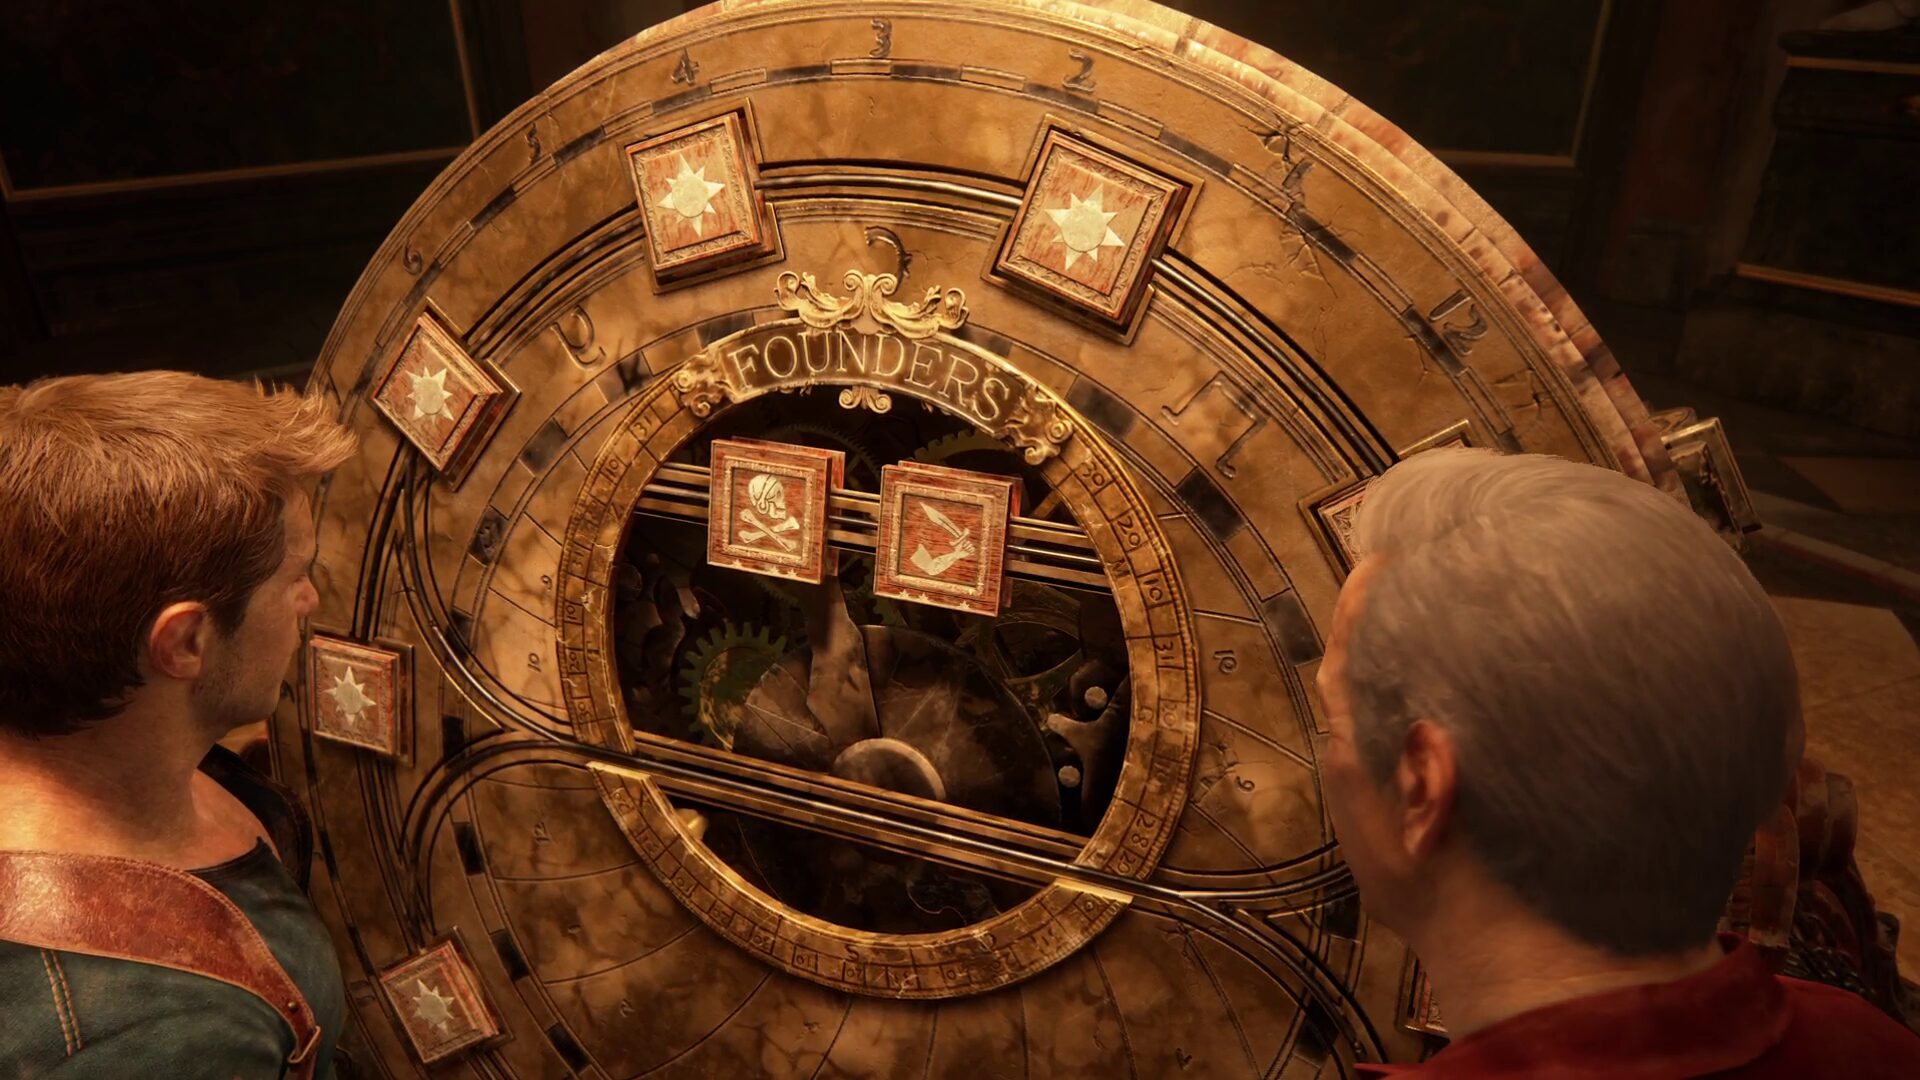
After descending underneath the clock bell tower in Uncharted 4: A Thief’s End, Nate and Sully come across a large wheel with a bunch of sigils located on the front. These are all founding members of Libertalia, the mythic pirate island the two are searching for. As expected, there’s a puzzle here that you need to solve in order to receive the information you need and progress the story. If you’ve been having trouble with the Founders Wheel puzzle in Uncharted 4 and need a hand, check out our guide for it below.


HOW TO SOLVE THE FOUNDERS WHEEL PUZZLE in uncharted 4
The Founders Wheel puzzle in Uncharted 4 is quite a long one, but it isn’t too complicated. It’s found during Chapter 11 “Hidden In Plain Sight” after you’ve dropped the clock bell in the tower and gone underground. To begin the puzzle, inspect the big wheel in the centre of the room. You’ll have to line up the markers on each side of the panels like this below.
This unlocks a room to the left hand side, so enter that and find three paintings. Each one has a unique square symbol hidden on there that you need to find, as it will become crucial to unlocking the next step of the puzzle. Here is where you can find the first three. Interact with the paintings using the onscreen prompts to activate the squares in your journal.


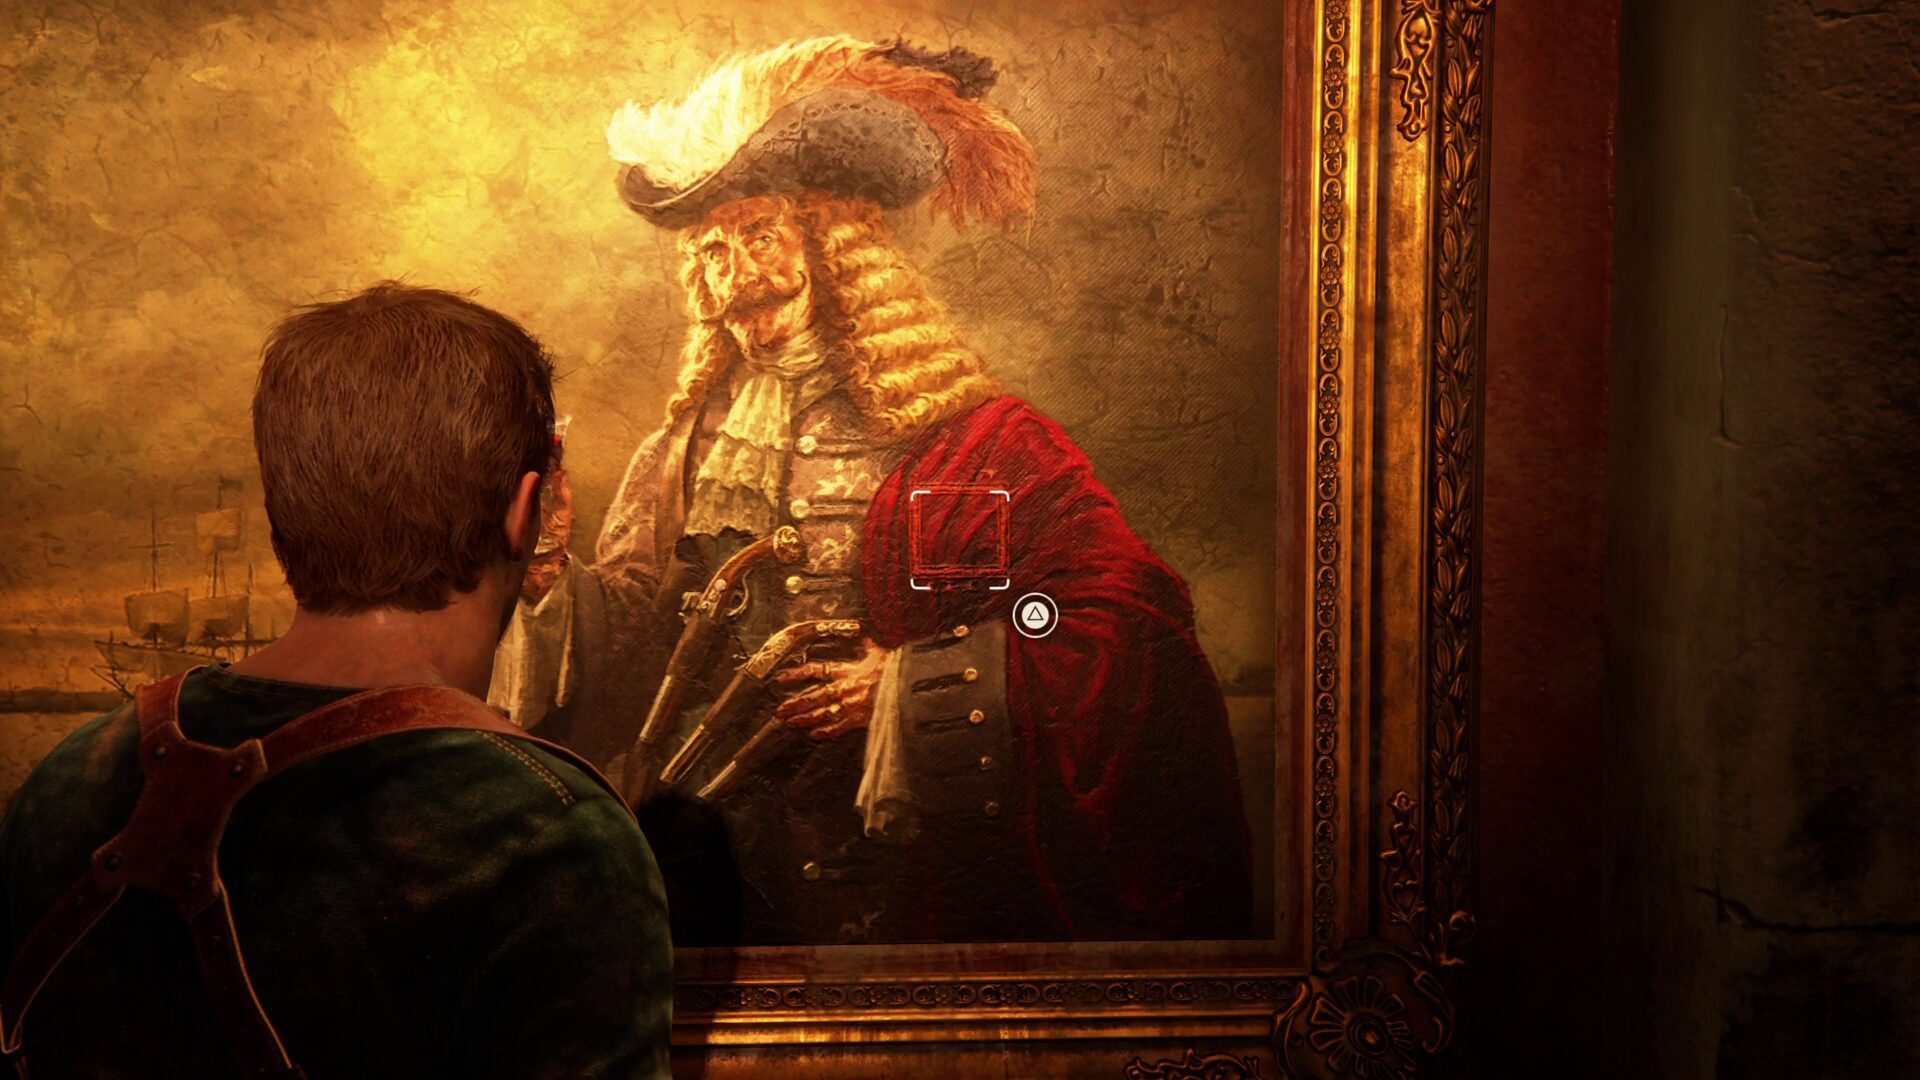


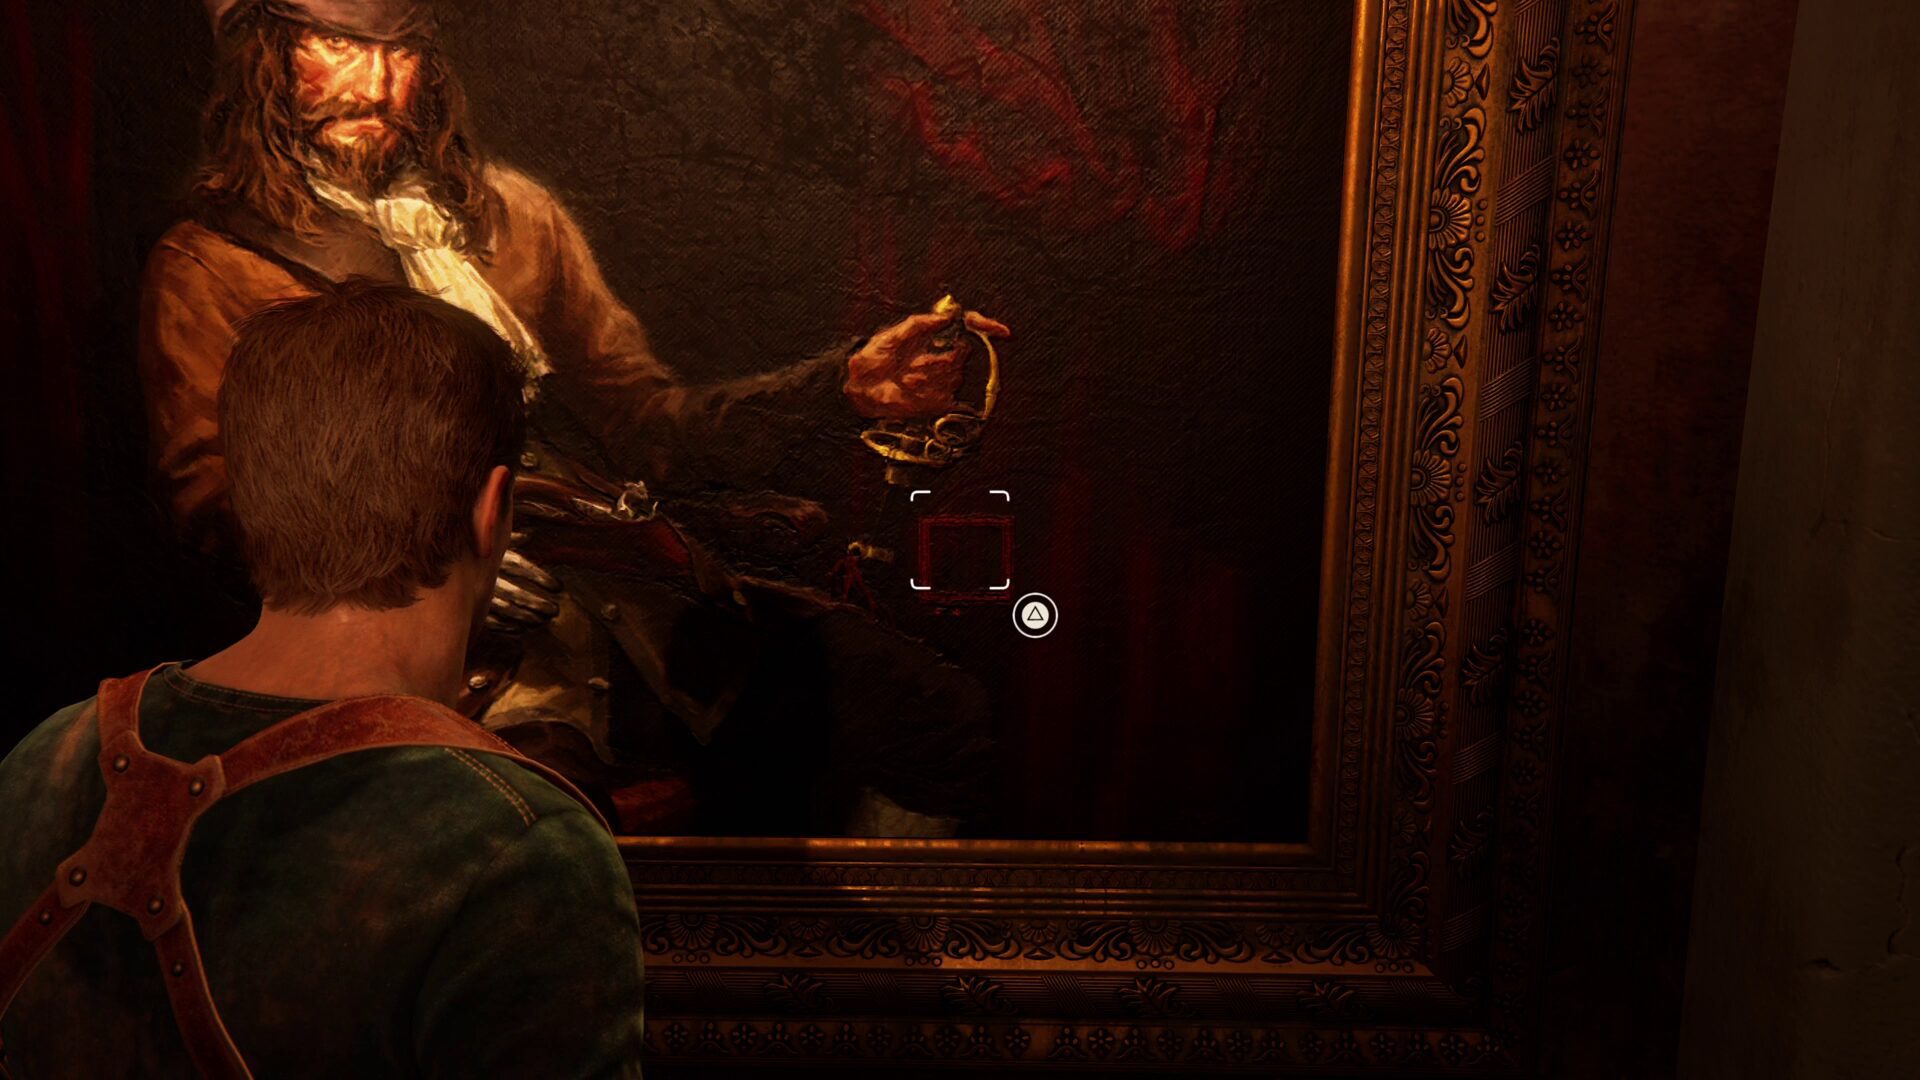


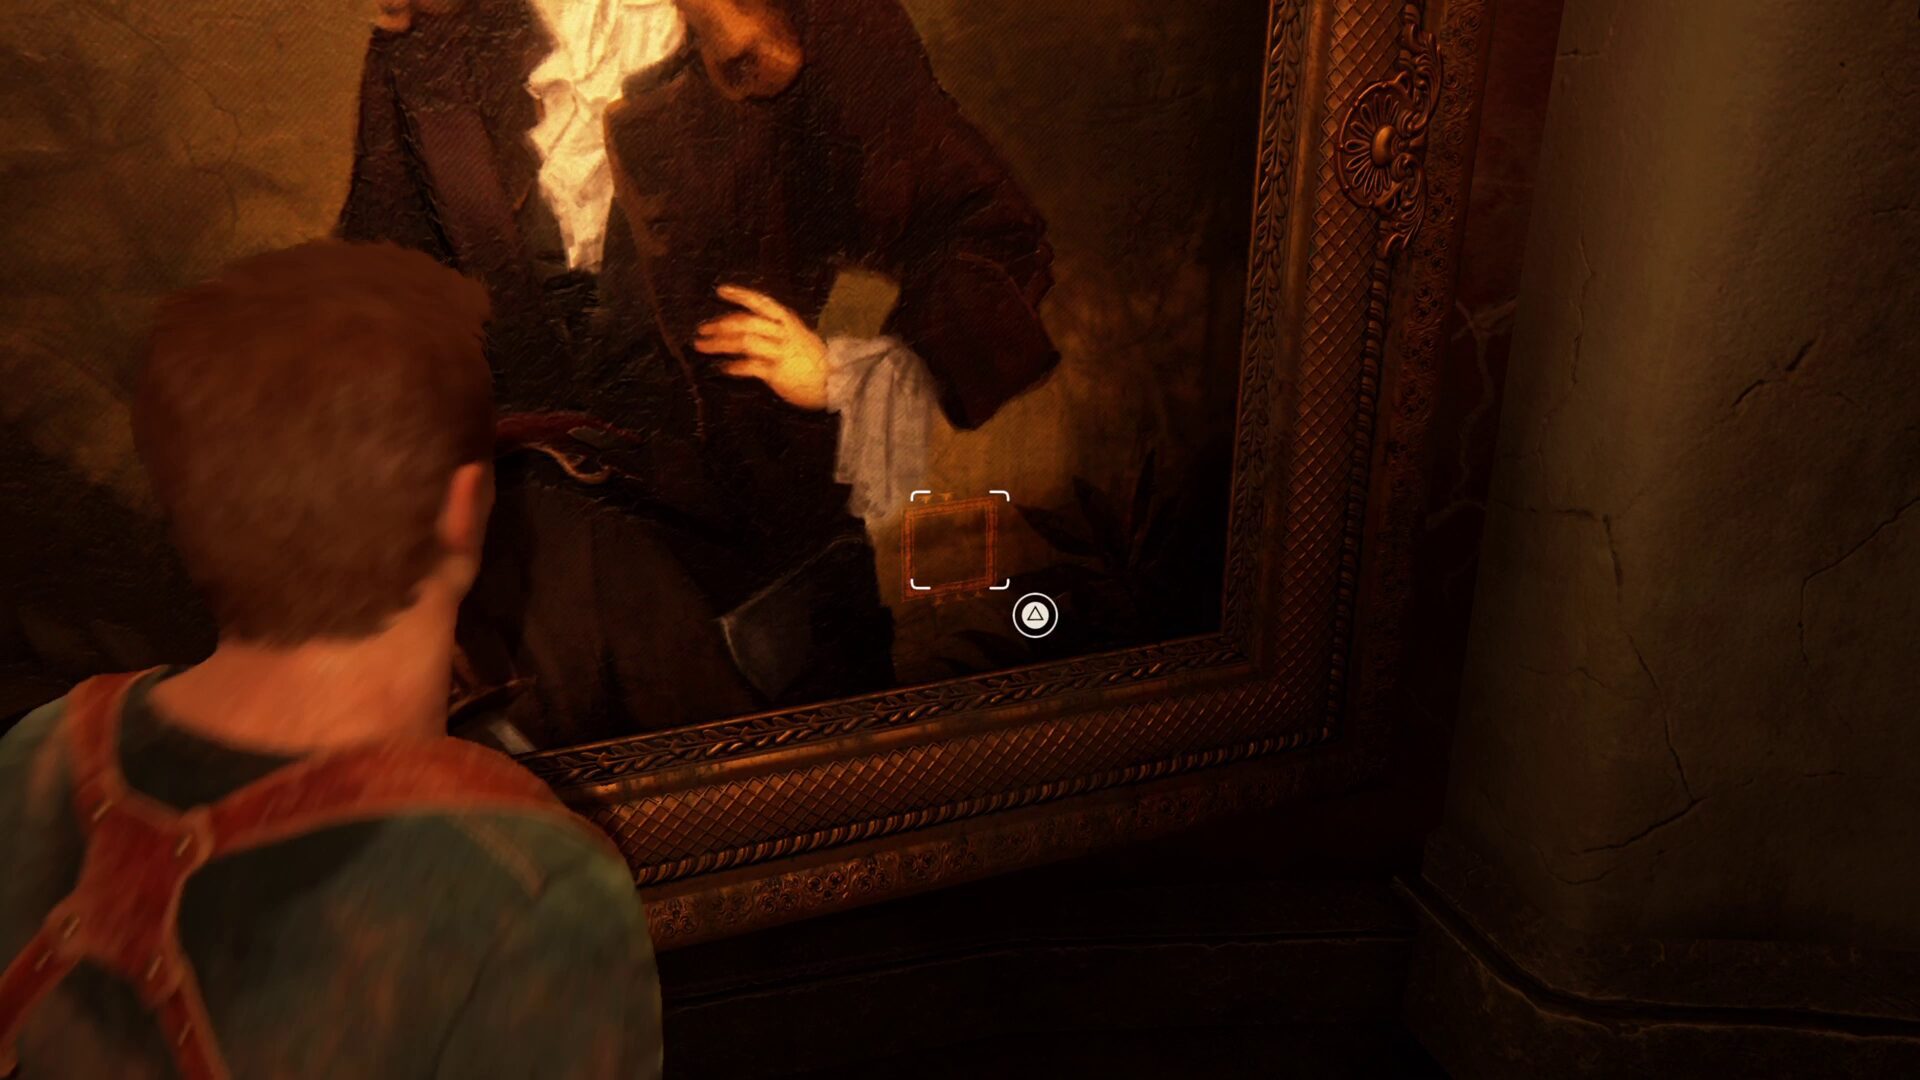
Once you’ve collected all the symbols, open your journal to see the three symbols jotted down on squares. You can use this sequence to rearrange the squares however you want. When you’re ready, head back into the main room and interact with the Founders Wheel again. Here’s what the symbols should look like to unlock the next room.


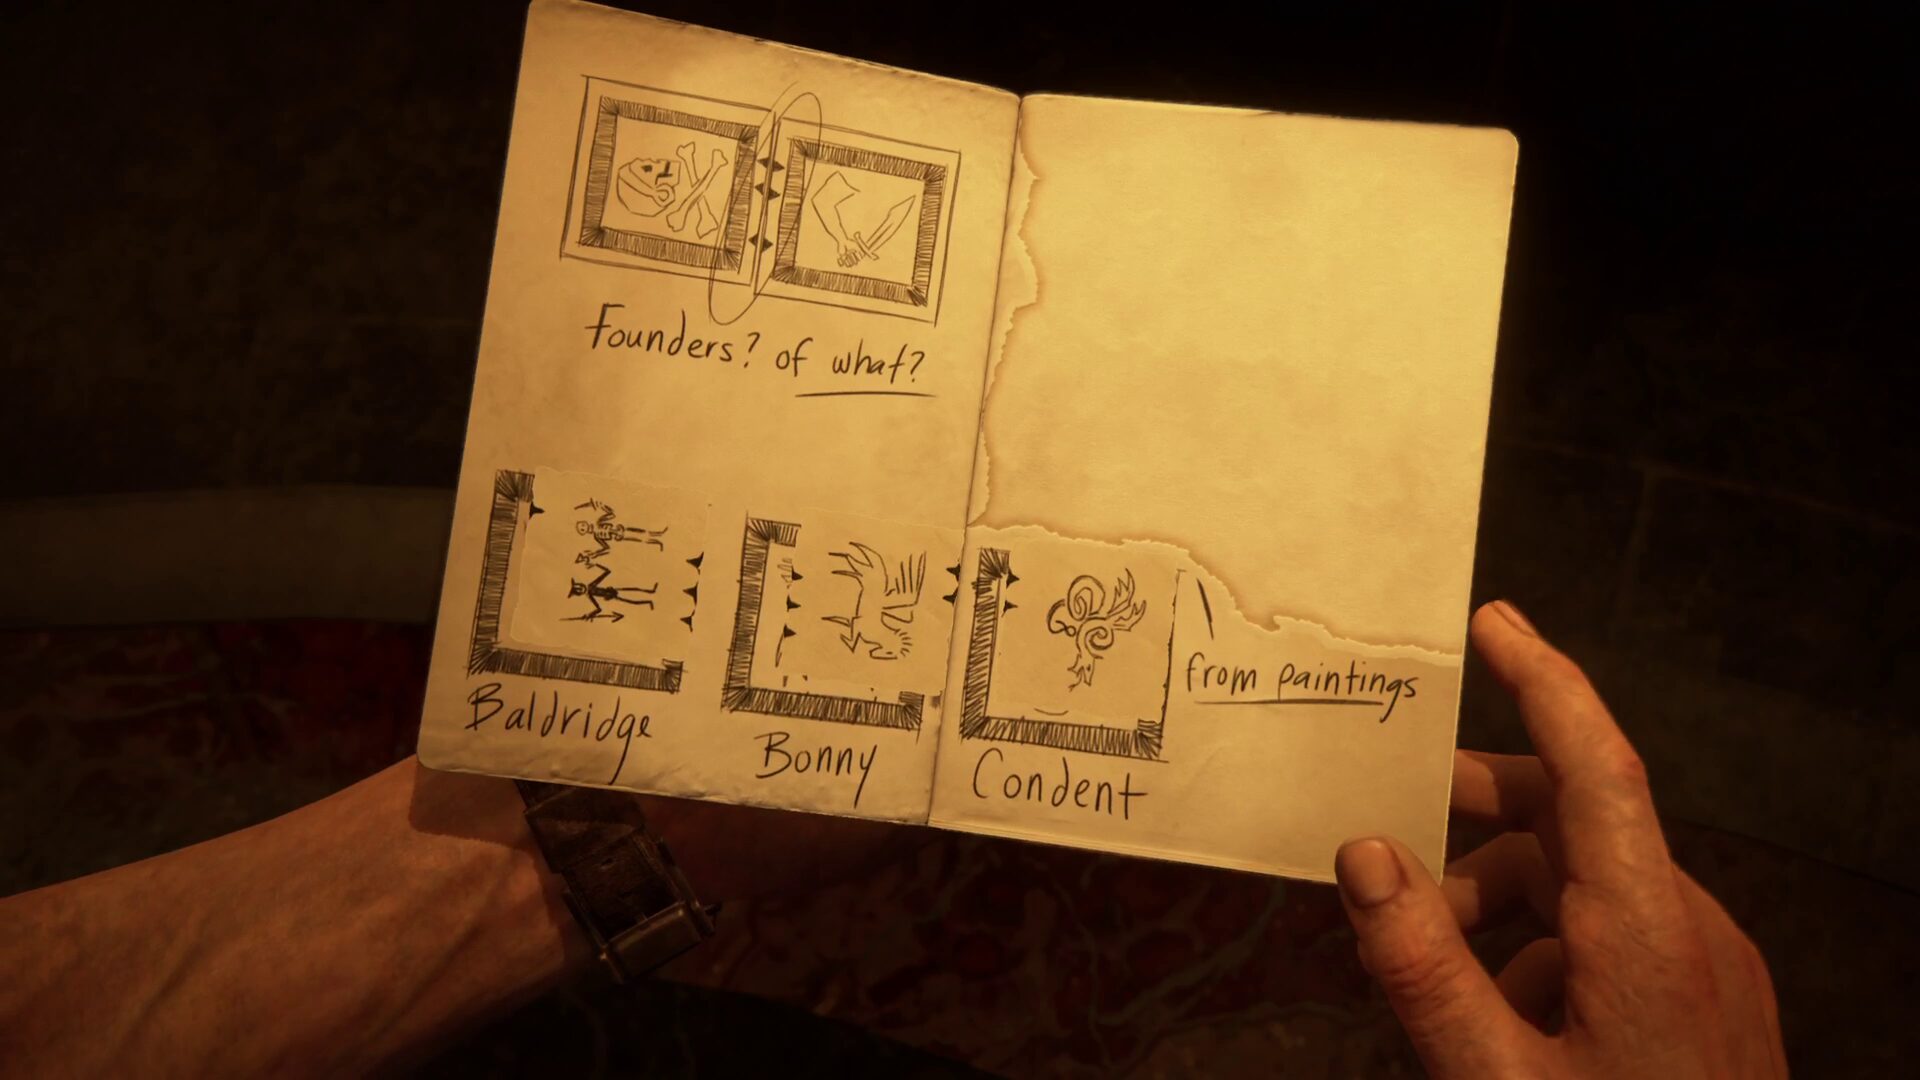
Arranging the symbols correctly will result in a new formation appearing, as well as another side room opening. Be sure to take a photo of Sully too when you have your camera out for a bonus trophy.
In the next room, three more paintings will be available for you to inspect. This is a repeat of the previous room, so take a close look at the paintings to find the squares again. These ones are a little more hidden, so be sure to watch them closely. You and Sully will need to lift up the painting on the right. Here are the locations of each symbol:


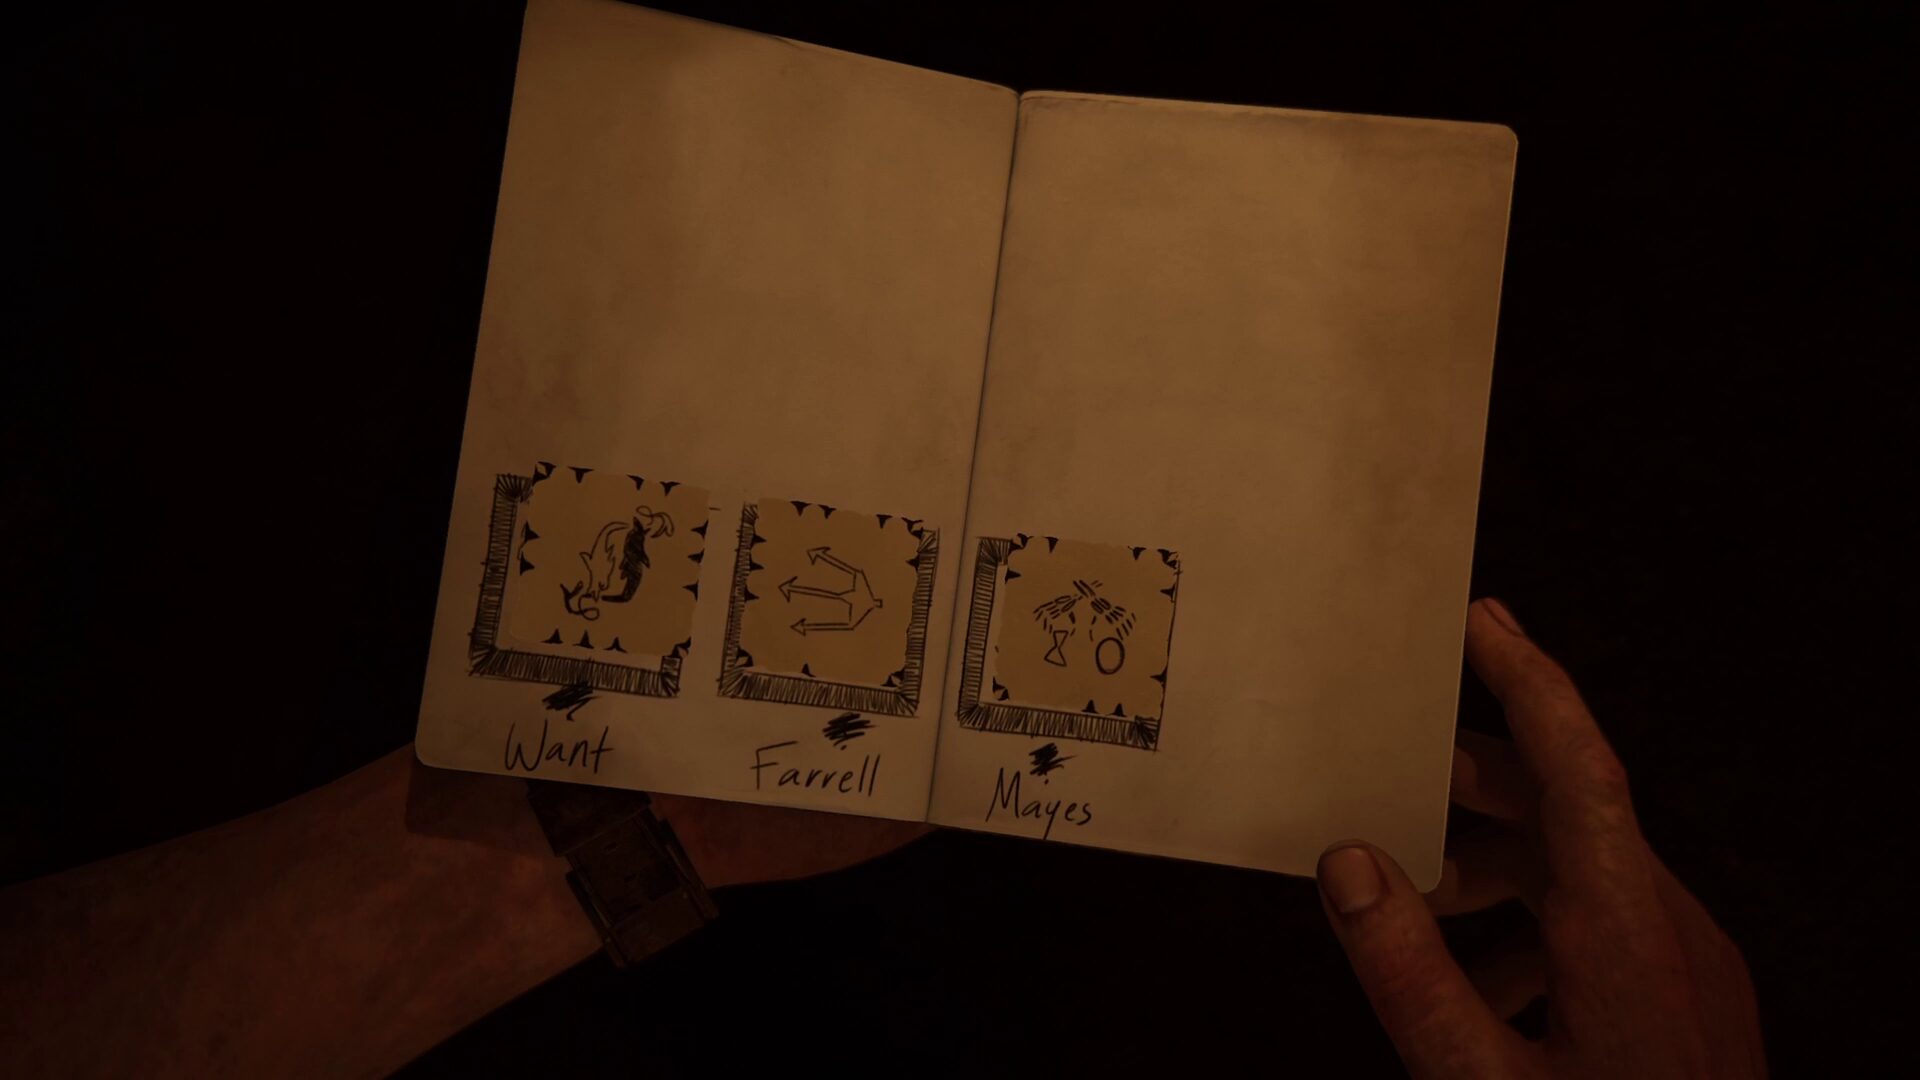
Once again, take your time rearranging the squares inside your notebook or head back to the Founders Wheel. Input the solution again to unlock another piece of the puzzle. A final room will open up containing four paintings this time.
ALMOST THERE
This room is harder, as some fire damage has resulted in a couple of the names being burned off. You’ll need to find the four squares on each of the painting, and then some deduction techniques to determine which painting belongs to which symbol.
In any case, here is the solution for the final piece of the puzzle.


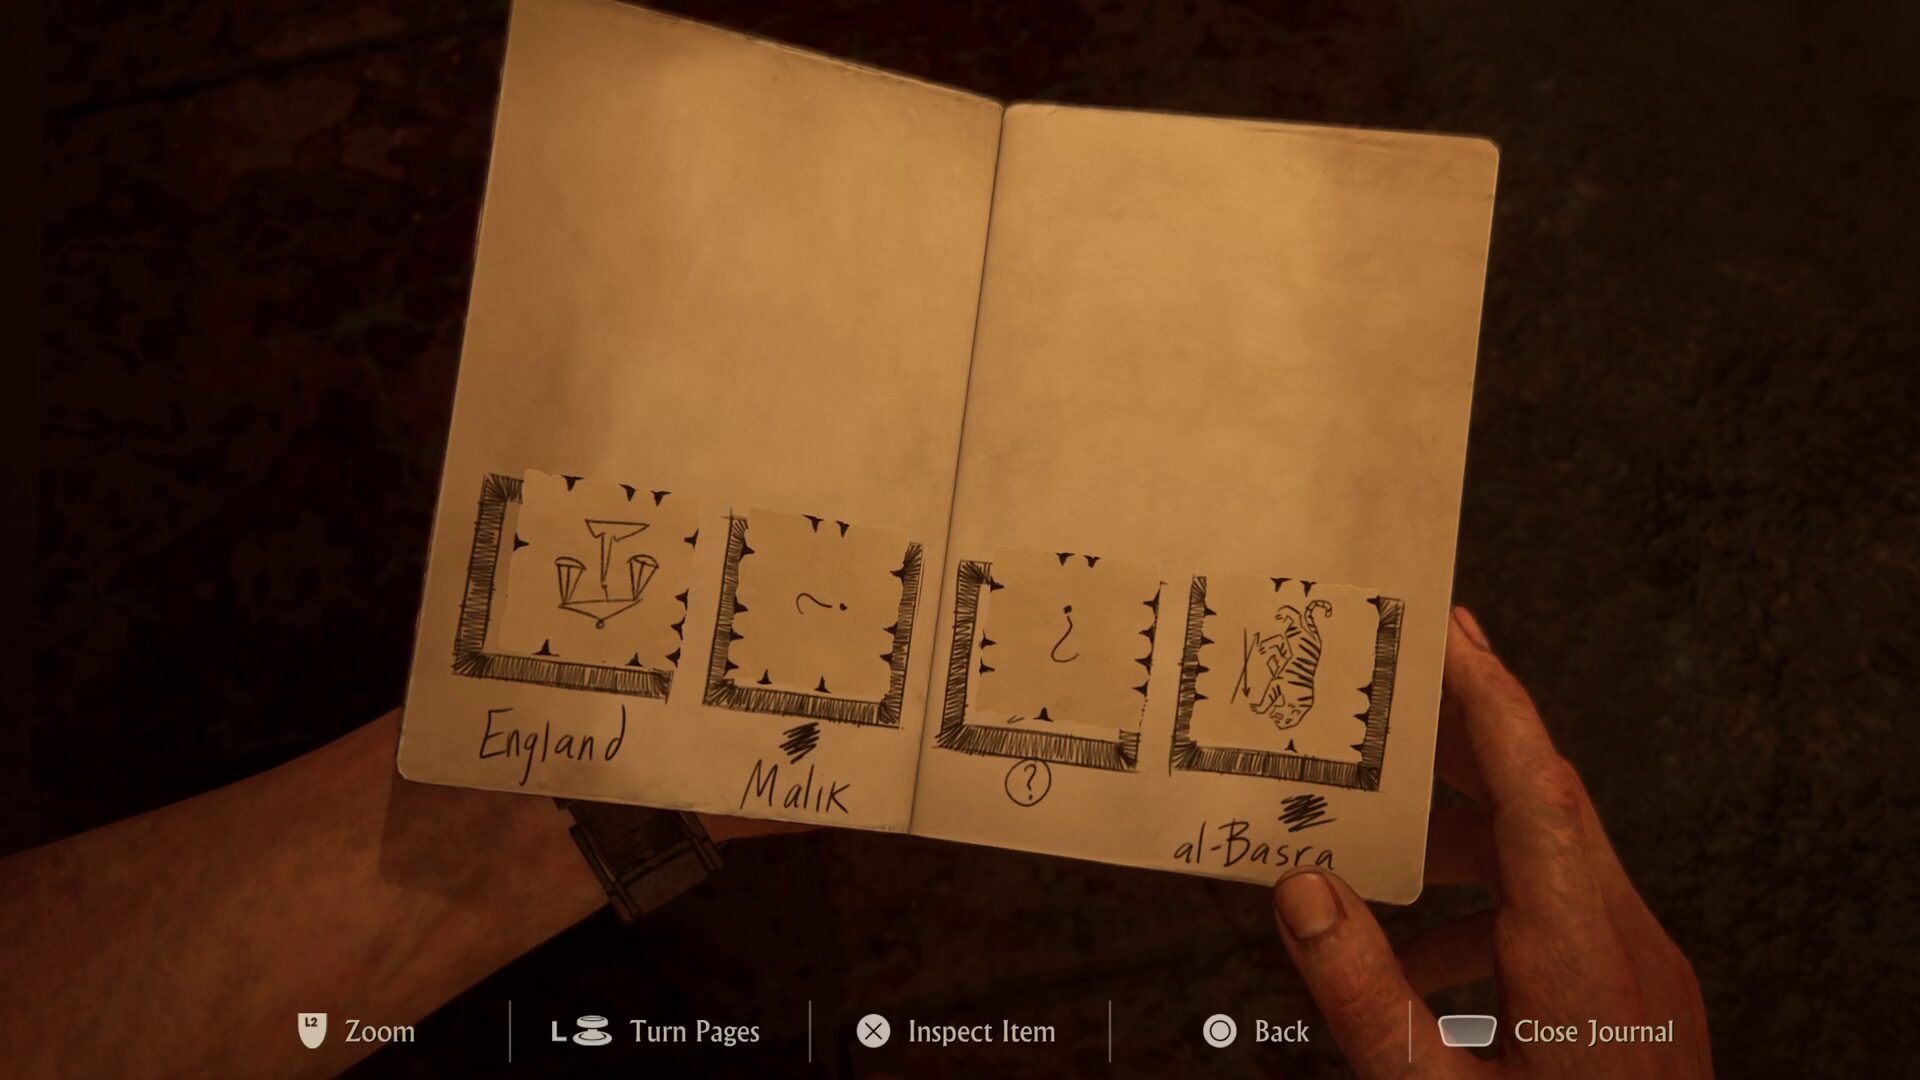
Head back to the centre room and pop them in that order. The last thing you need to do after the cutscene is take photos of the three discs that have now been revealed, and then you’re good to go.
If you find yourself stuck on other puzzles in Uncharted 4 be sure to check out our other guides.
SHOP WITH GAMEBYTE!
Don’t forget you can find great games and more on the GameByte Shop! Our store is stocked up with the latest games, merch and accessories. We might even have a new-gen console or two! Sign up to our newsletter to be notified of our console drops, deals and more. Please note the GameByte Shop is available for UK customers only.
Featured Image Credit: Naughty Dog
